The update client
The Update client is made to simplify the administrative work with the
TCN system. It handles update of the database with new releases, downloading
of software, activation of additional modules and administration of bound
user licences.
The update client is a separate application and does not need any installation.
It can be launched directly from where the application files are located.
Note: the Update client communicates with our service at our TCN-server
via port 80, which implies that this port must be open for outbound TCP/IP traffic
on the computer where the update client is to be run.
You don't need to download the new update client every time you want to
manage or update the TCB system. If there is a newer version of the update
client than the one you are currently using, you will be notified about that.
 Download the Update Client.
How to use the Update Client
Login and user rights
To use the update client the user needs to be a TCN user, i.e. have permissions
to TCN database.
In order to update the database with the update client, i.e. new releases,
the user then need to have DBA rights (be the database administrator).
To activate additional modules, expanding the maximum number of cables
or administer fixed licences then it is enough to be a member of the group
(Role in SQL Server) OptoUpdate in the database.
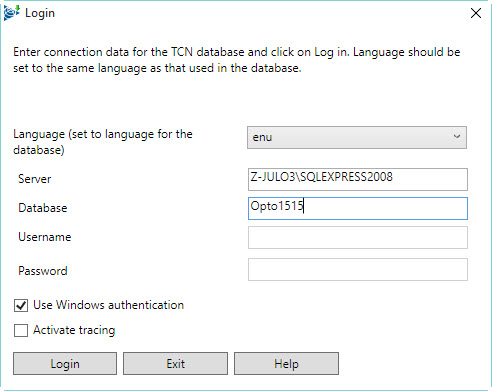
Login dialog looks like below. The following data needs to be specified:
The SQL server where the database is TCN
- The name of TCN database
- User name
- Password
- Language.
Note that the language must be set to the language used in the TCN database,
that is, "eng" for English or US customers, "sve"
for Swedish etc.
You can also check the 'Use Windows authentication for the Windows user
has permissions in TCN database. Once in the update client are several
tabs depending on what you want to do.
In the update client there are different tabs depending on what you want to do.
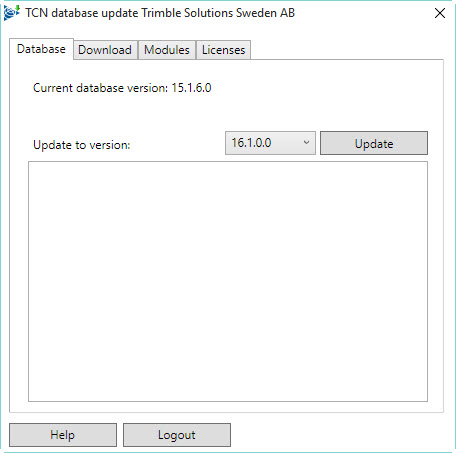
Database
This tab is used to upgrade the database.
Current database version is displayed, and available database versions
(only those that are later than the current) are listed in the dropdown
list.
To upgrade the database, select the target version from the drop down
menu and click the Upgrade button.
Usually you want to upgrade to the latest version.
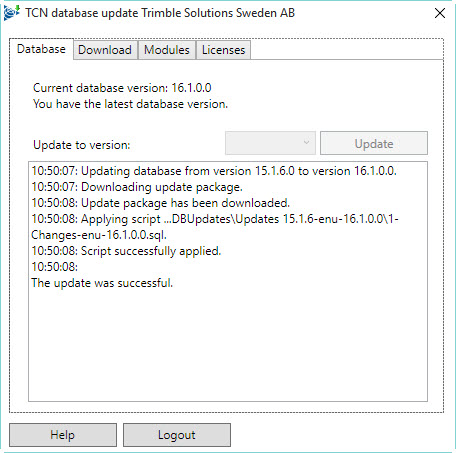
A successful database update looks like this:
Download
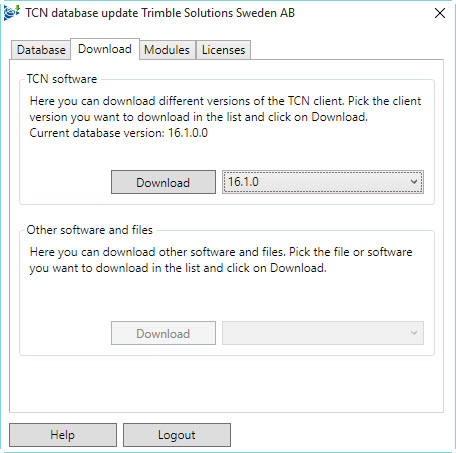
This tab is used to download the installation package for both TCN application
and other related software.
To download the installation package for TCN application, select the
version of the TCN application you want to download in the drop down menu,
and click the Download button next to the drop down menu.
To download other software, select the software you want to download in
the drop down menu, and click the Download button next to the drop down
menu.
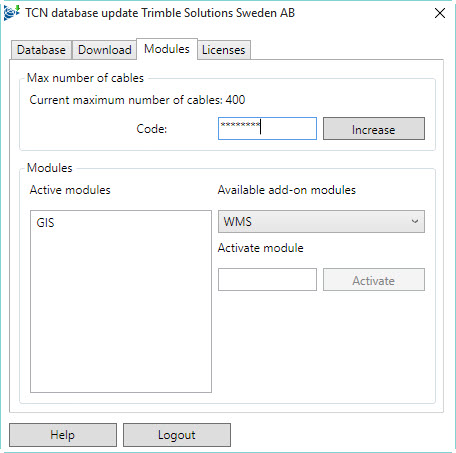
Modules
This tab is used to provide overview of existing modules, the maximum
number of cables, and enable new modules and increase the maximum number
of cables.
To increase the maximum number of cables or activate a module an activation
code is required from Trimble (or Trimble Solutions Sweden AB). You'll
get such code when ordering.
The activation code is entered in the code field. If a module is to be
activated, you need to also choose which module it is you wish to activate
in the drop down menu. Then click the relevant button, "Increase"
when extending the maximum number of cables, "Activate" when
activating a module. A message will be displayed with whether the cables
extended / module enabled was successful. Thereafter, the functionality
is available in TCN.
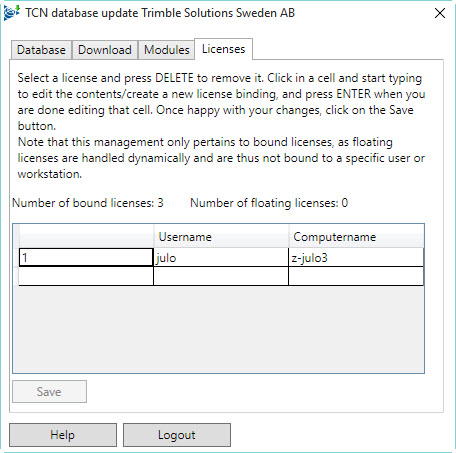
Licences
This tab is used to administer bound licences. Floating licences are
managed dynamically and therefore need not be administered manually.
When starting TCN application and logging in to the database, the program
will first try to take a bound license. If a bound license is not assigned
to the user, and there still exists free bound licences, the program will
automatically assign the user a bound license. If all bound licences are
used, the program will try to take a floating license.
A bound license is tied to a combination of user name and computer name.
To specify a bound license to a specific user and computer,
highlight the username field on a blank line, left-click on it and enter
the user name. Then select the field for the computer name on the same
line by left-clicking on it and then enter the computer name. When you
are satisfied with your changes, press ENTER. Now the user has a bound
license on that computer.
To delete a bound license for a specific user and computer,
select the appropriate row in the list, then press DELETE.
To edit a fixed license for the specified user and computer,
select the user name field for the license you want to edit by left clicking
on it and enter the new username. If the new user should be bound to another
computer, select the field for the computer name and enter the computer
name. When you are satisfied with your changes, press ENTER.
NOTE: No changes you make to licences are saved until you press the Save
button. The program will also prevent you from adding more permanent licences
than what is defined in the license file. If no permanent licences exist
in the license file, the control of fixed licences to be disabled.
|